Below is s step-by-step guide on how to store POL (Polkadot) on Ledger Live
Please download the last update of Ledger Live Application:
1. Ledger Live for Windows 10/11
2. Ledger Live for MAC
3. Ledger Live for Android
Step #1: Start by Setting Up Your Preferred Ledger Device
- Ensure that your Ledger device (Stax, Nano S or Nano X) is set up with a unique PIN code and recovery phrase.
- Safely store your exclusive recovery phrase.
- Upgrade Ledger Live and your preferred Ledger device firmware to the latest versions available.
Step #2: Install Polkadot App on Ledger Live
- Open Ledger Live and go to the Manager tab.
- Select Polkadot and install the app on your preferred Ledger device.
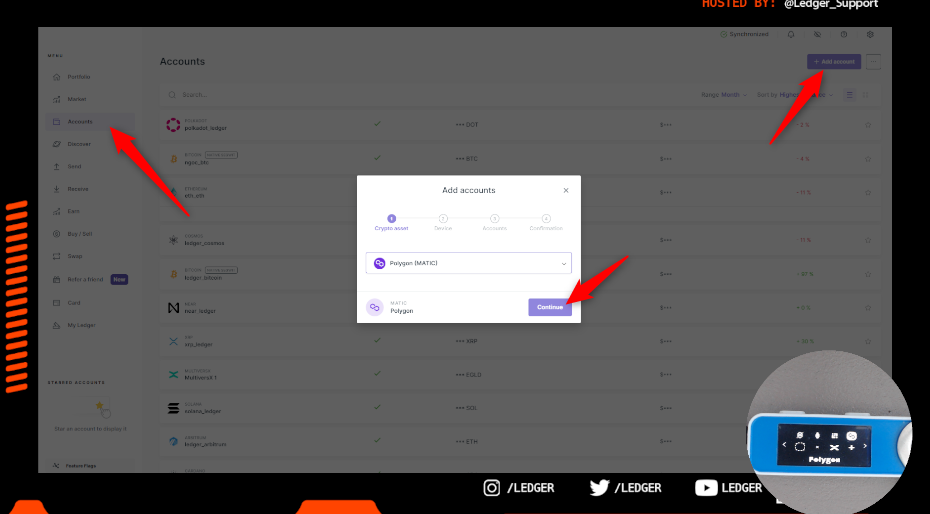
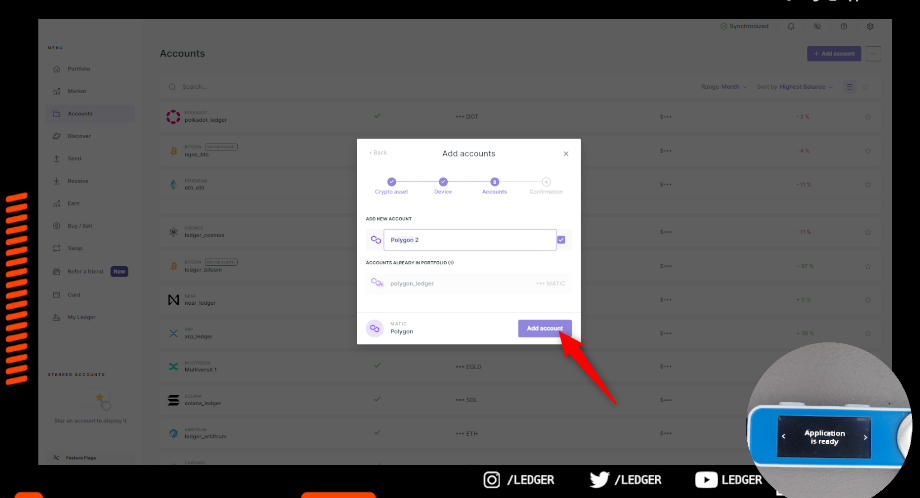
Step #3: Add Polkadot Account in Ledger Live
- Go to the Accounts tab in Ledger Live.
- Select Add Account and click or tap on Polkadot.
- Follow the on-screen instructions carefully to add an account.
Step #4: Set Up Wallet That Supports Polkadot
- Install a wallet like Polkadot-JS or Subscan.
- Follow wallet instructions to connect to your preferred Ledger device.
Step #5: Transfer POL to Ledger Wallet
- Copy Polkadot address from wallet (e.g., Polkadot-JS).
- Start a transfer from a platform where you stored POL tokens like an exchange or another wallet.
- Paste Ledger Polkadot address to send POL tokens.
Step #6: Confirm Transaction
- Verify that POL tokens appear in the Polkadot wallet linked to your preferred Ledger device.
- Check address again to confirm transfer.
Important information:
- Always verify addresses to avoid sending tokens to an incorrect address.
- Be watchful and avoid phishing attempts when transferring assets.
- Your POL tokens are now safely stored on your Ledger device, manageable via Ledger Live and the compatible wallet.