
Install the Zilliqa app on your Ledger device to manage ZIL with the Zillet web wallet. The Zilliqa app is developed and supported by the Zilliqa community.
Note that it is not recommended to use the Zilliqa app for token transfer unless you are an advanced user. Zilliqa accounts cannot be added to Ledger Live.
Please download the last update of Ledger Live Application:
1. Ledger Live for Windows 10/11
2. Ledger Live for MAC
3. Ledger Live for Android
Before you start
- Set up Ledger Live with your device.
- Update the firmware of your Ledger Nano S / Nano S Plus / Nano X.
Install the Zilliqa app
- Open My Ledger in Ledger Live.
- Connect and unlock your Ledger device.
- If asked, allow My Ledger to access your device.
- Find Zilliqa in the app catalog.
- Click the Install button of the app.
- An installation window appears.
- Your device will display Processing…
- The app installation is confirmed.
Accessing your Ziliqa tokens via Zillet with ledger device
- Now, navigate to https://zillet.io (a web-based Zilliqa wallet) on your Google Chrome web browser;
- Select ‘Ledger’ as the preferred option to Connect and you can access your Ledger wallet via Zillet;
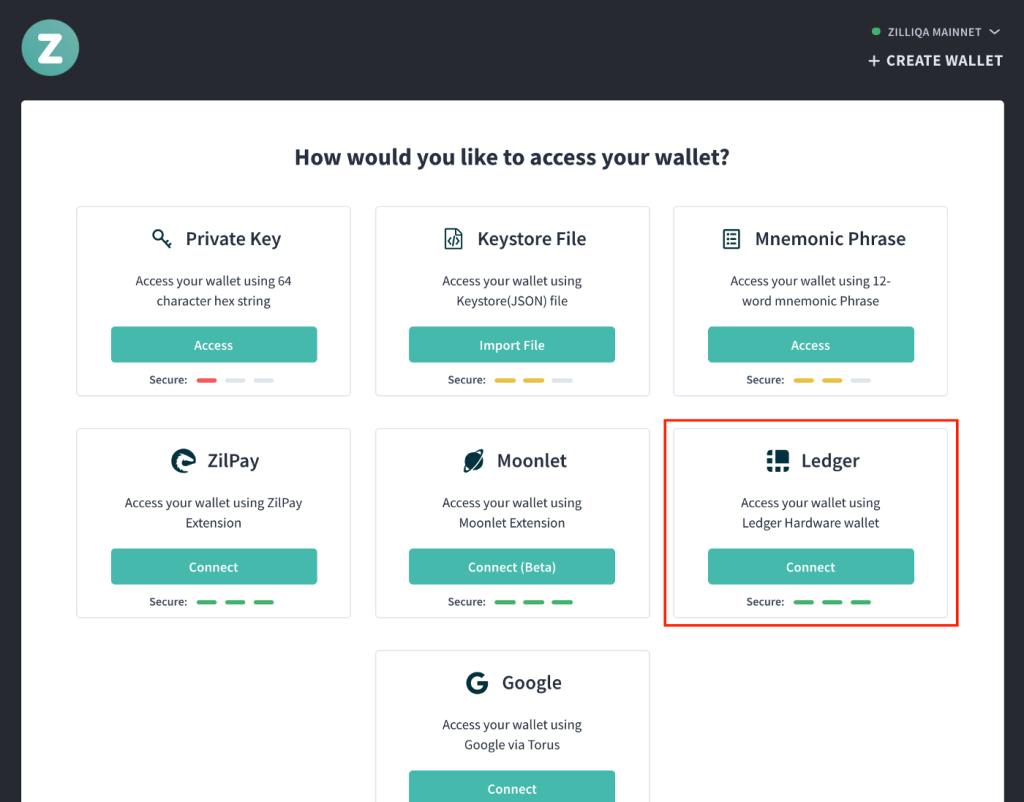
- Connecting to your Ledger wallet on zillet.io via the Ledger device
- Select which index key you wish to use (default index key is #0) and confirm the use of that index key on your Ledger device by simultaneously clicking both the left and right buttons. For key index #1 or more, click the Next Account button;
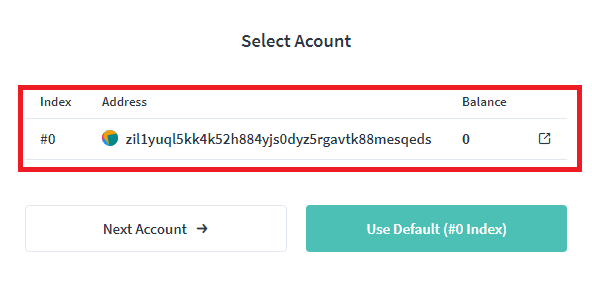
Selecting the default index key (#0) as your wallet account
- You now have access to your wallet account on Ledger via Zillet!
Receiving Ziliqa via Zillet
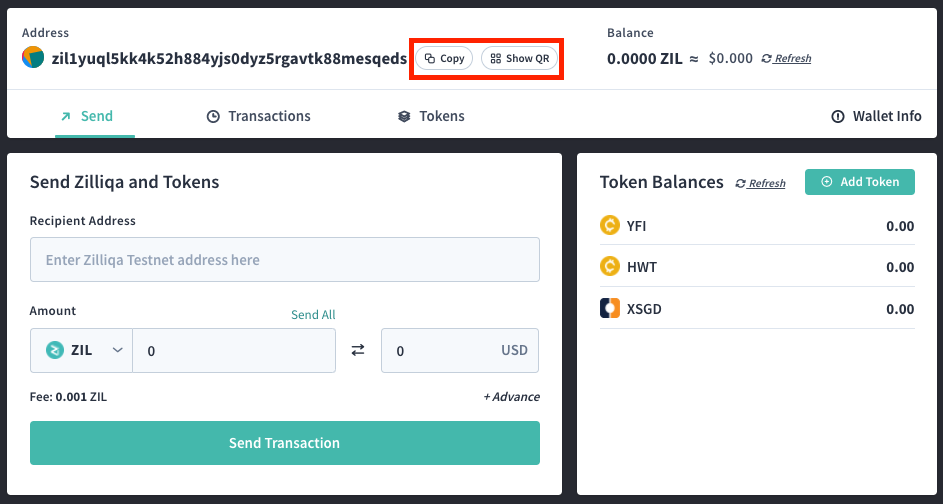
- To receive digital assets on your Ledger, simply click on the Copy OR Show QR buttons to send your Zilliqa address to the sender’s wallet.
- ⚠️ Do note that all valid Zilliqa addresses begins with zil1.
Sending Ziliqa via Zillet
- Input the Recipient Address, choose the digital asset you wish to send ($ZIL in this case), input the Amount you wish to send, then click on Send Transaction;
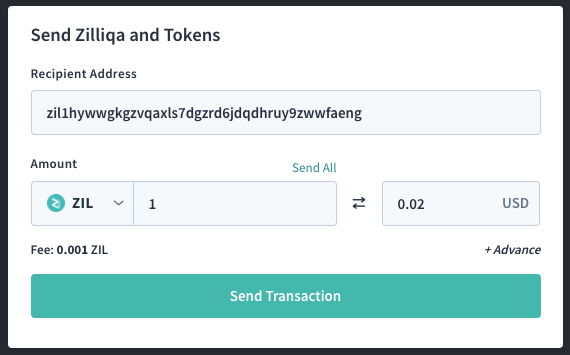
Sending 1 $ZIL to a mainnet Zilliqa address
- Confirm the Transaction Details again and click on Send this transaction.;
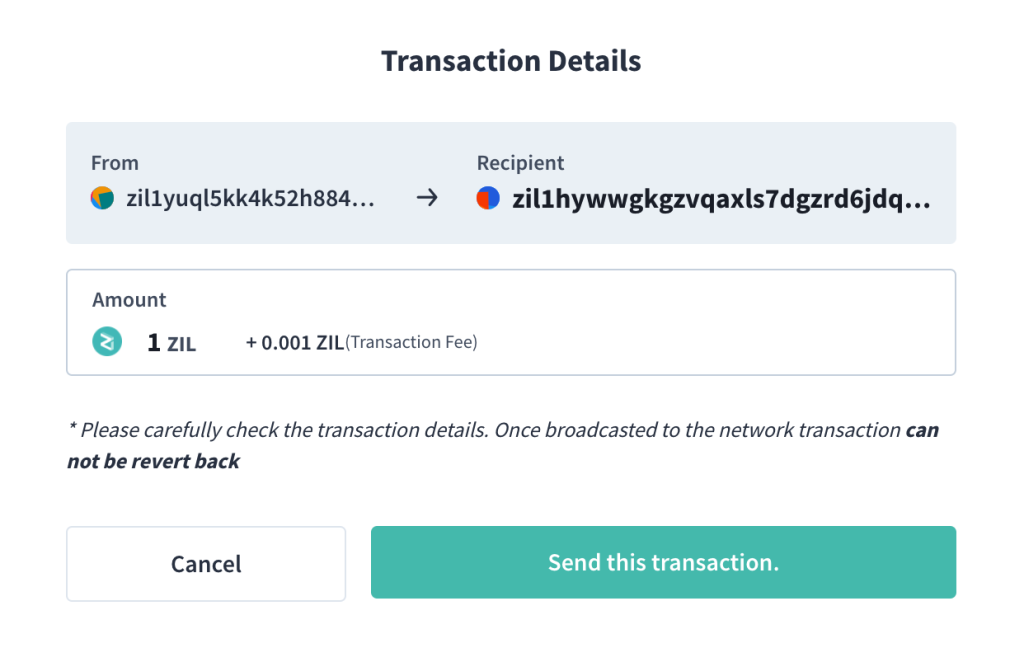
Confirming the Transaction Details one last time…
- Confirm the details of the transaction once more on your Ledger device. Check if the recipient address and amount displayed on the Ledger are exactly the same as what you keyed in as per the previous step;
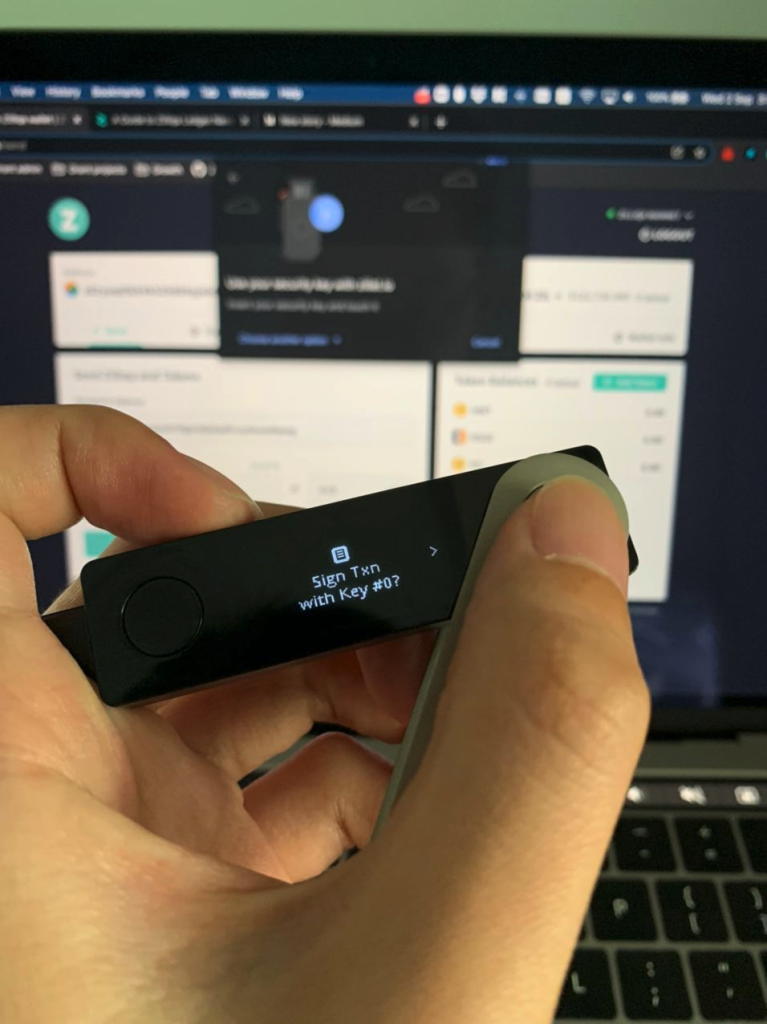
Check the transaction details by scrolling using the right button
- Authorise the transaction by clicking both the left and right buttons simultaneously on your Ledger device if the transaction details match;

Authorise the transaction by clicking both the left and right buttons simultaneously
- Now that your transaction to the Zilliqa mainnet has been authorised and broadcasted, simply wait for the transaction to be included in the next block and it will be confirmed;
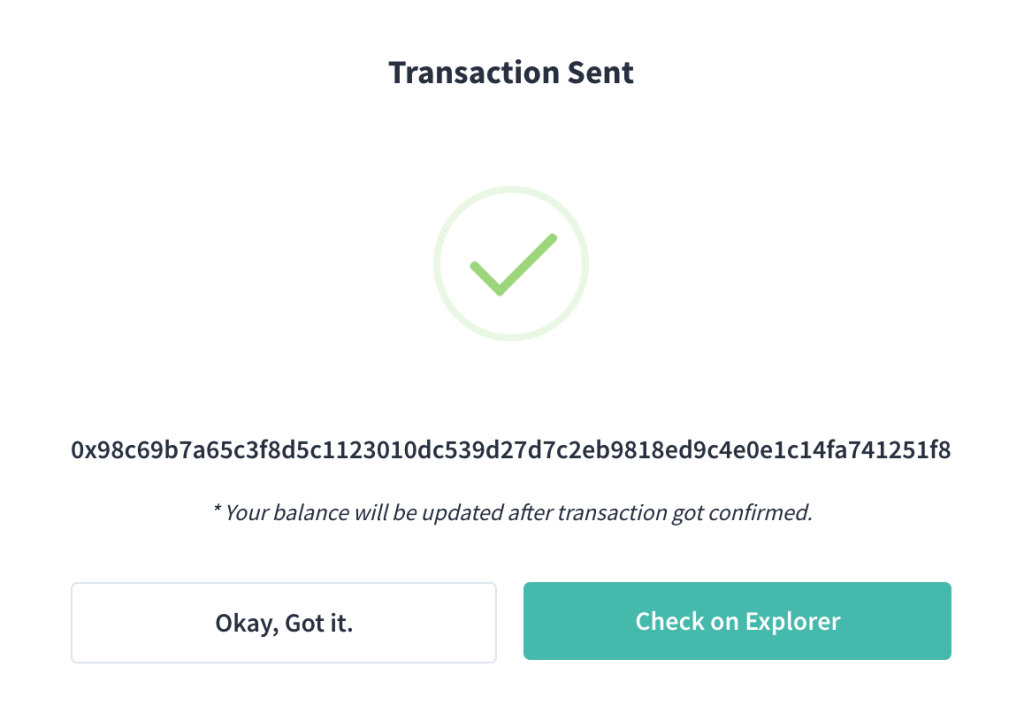
Successfully broadcasted the transaction on Zilliqa mainnet
- Navigate to the Zilliqa block explorer viewblock.io to check the status of your transaction! You may need to wait awhile for the transaction to be confirmed – factor in waiting time of around 1-2 minutes.
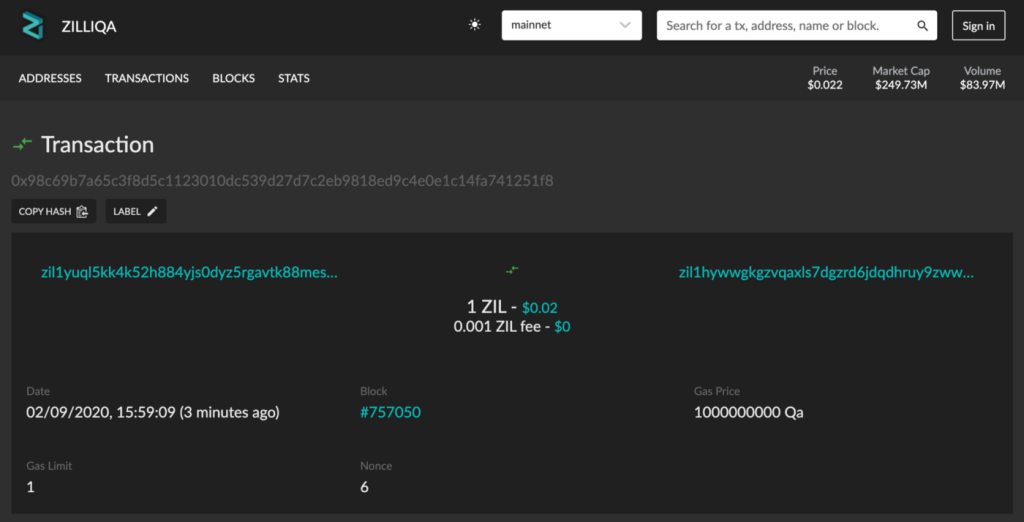
Transaction on Ledger sent via Zillet has been successfully confirmed on the Zilliqa mainnet.