Please download the last update of Ledger Live Application:
1. Ledger Live for Windows 10/11
2. Ledger Live for MAC
3. Ledger Live for Android
Before you start:
- A Ledger Nano X or S.
- Fully configured Ledger Live: Follow Ledger’s guide if you haven’t yet.
- Update your Ledger device firmware.
- Update your Ledger Live app.
- Nervos App installed on your Ledger.
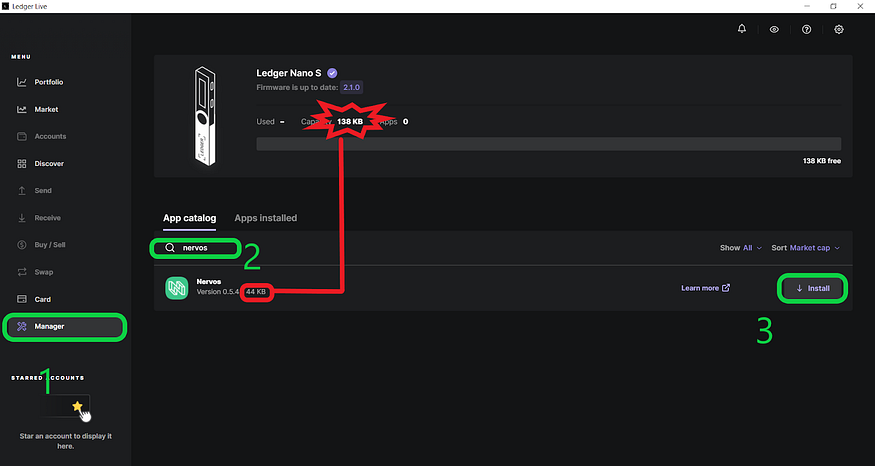
How do I use the Ledger Nano S to store and transact CKB?
You will need to install the Nervos Network’s app from the Ledger Manager.
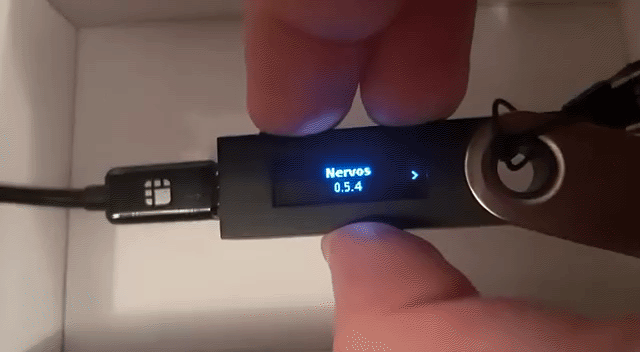
After you installed your Nervos App on the Ledger Live, you can see the app itself in the menu on your Ledger device. Open the menu on your ledger device.

Go to the Configuration option and select it. You can choose what Addresses you want (mainnet or testnet), and for the more advanced users, you can choose to enable Hash Sign and Contract Data.
NOTE: Every action you do from this moment, make sure that your ledger device is already connected to ledger live.
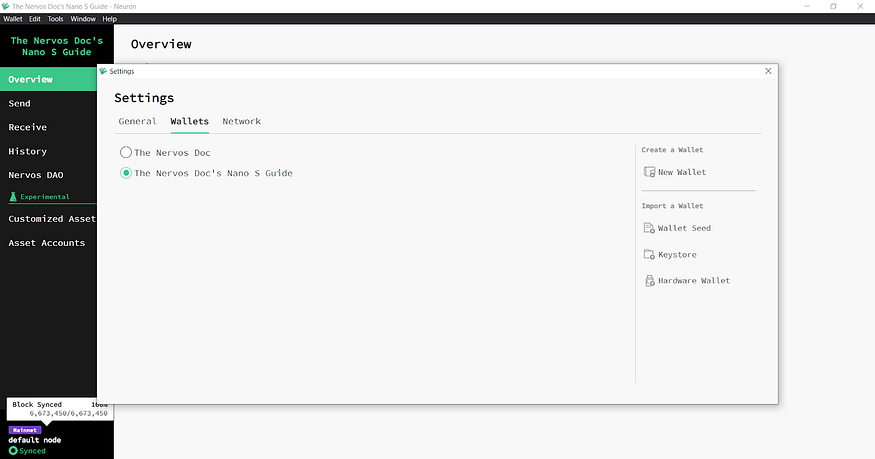
Now you want to connect your Ledger Nano S to your Neuron Wallet which you can do by visiting: https://www.nervos.org/wallets. After you set up your Neuron, go to Help, and then press Settings.
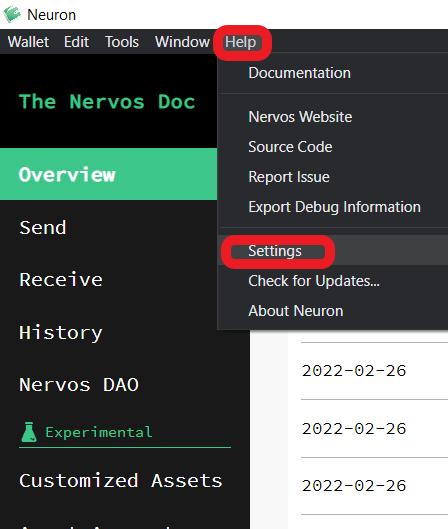
The following should be showed:
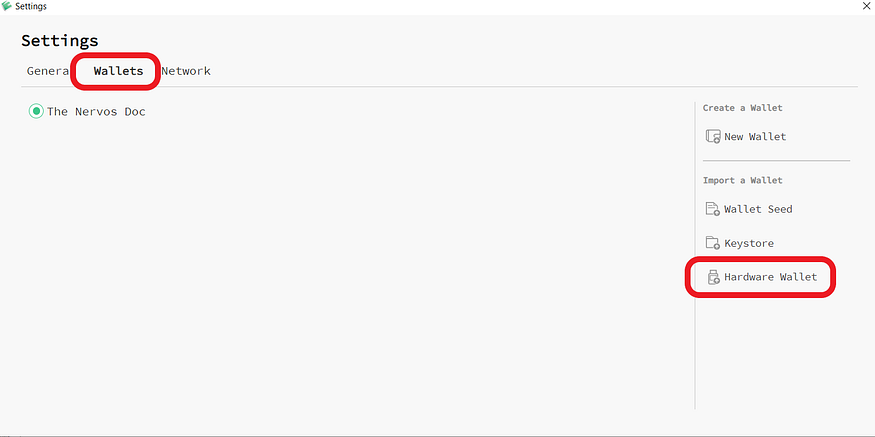
IMPORTANT!: Before you go any further, go to your ledger device and open the Nervos app. This will allow the Neuron wallet to recognize your device.
After you do this step, go back to Neuron Wallet. Click on Select your Model, and choose your ledger device model.
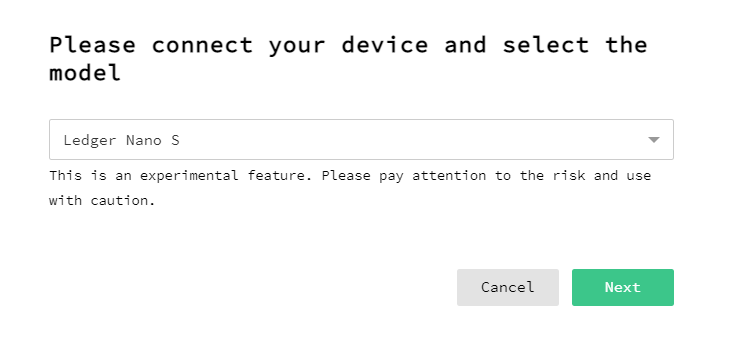
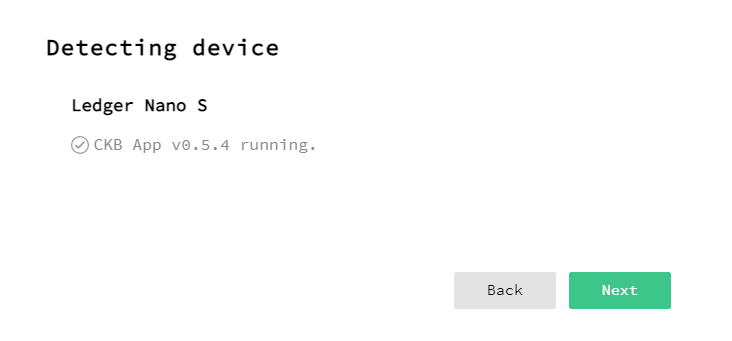
Wait for your ledger device to be detected.
You will need to confirm the connection between your ledger device and Neuron wallet.
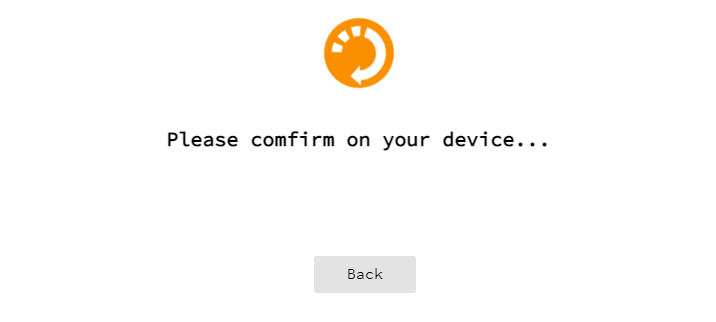
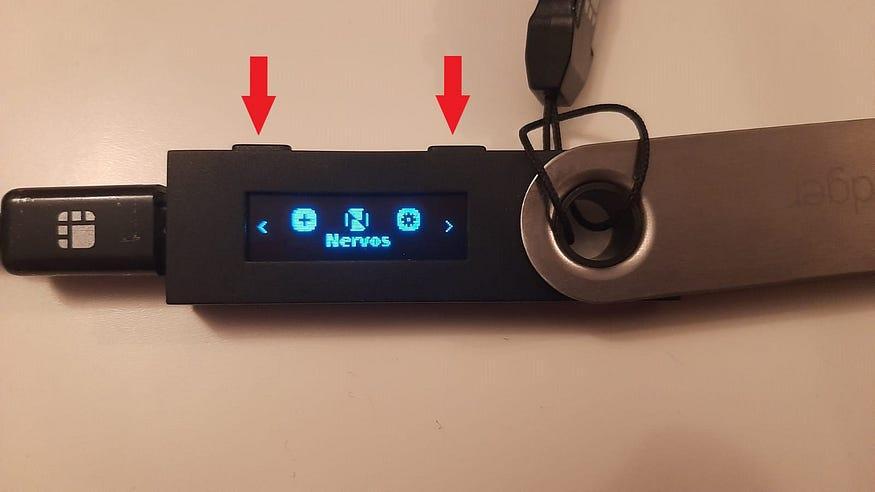
Check your ledger device: you should see the public key, and the possibility to REJECT or ACCEPT the connection. Press both buttons at the same time on ACCEPT.

You will need to choose a name for the imported Ledger device public Key.

After you successfully imported your Ledger device public address to your Neuron wallet, you should see both your wallets on the main menu, just like this:
From now on make sure that you are always sending CKB to the Nano S public address, by choosing the ledger device as the default. Always double check.
Go to Receive: you can see your ledger device public address. UNLIKE the neuron wallet’s public address, the ledger device public address will NEVER change. It will always remain the same, because the extra security is offered by the hardware wallet itself.
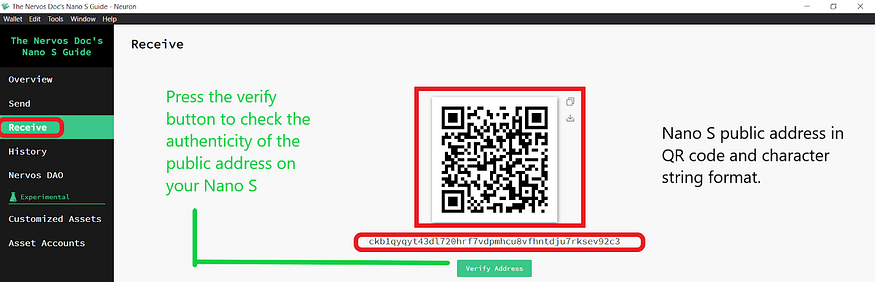
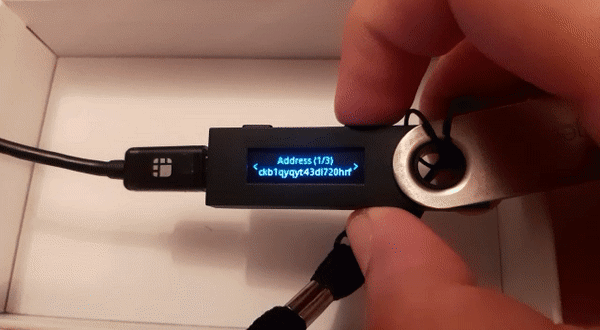
This is what you should see on your Ledger device when you Press Verify:
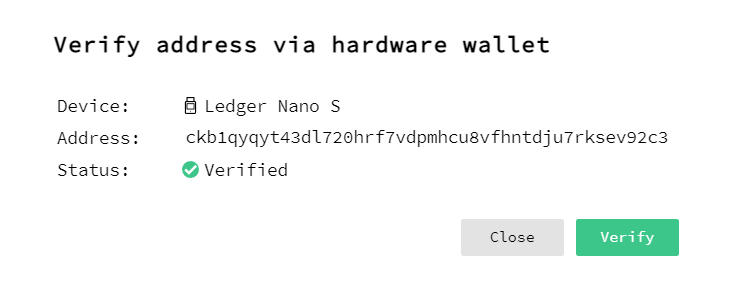
And this is what you should see after you successfully verified your Ledger device public address on your Neuron Wallet:
Now that you fully verified your public address, you are ready to do your first transactions. Of course, to deposit is a very easy task and does not involve the use of your hardware wallet at all. You just need your public address (that has just been confirmed in the previous step) and copy-paste it, like any normal transaction.
Ledger device keeps your funds safe, because it does not let you SEND CKB from Neuron wallet WITHOUT hardware confirmation.
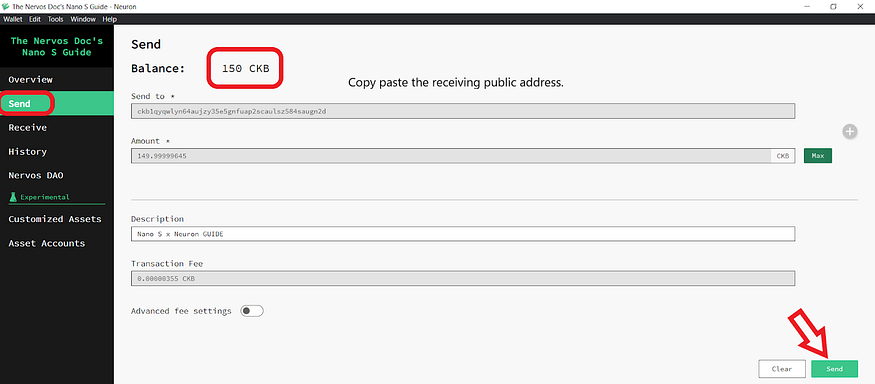
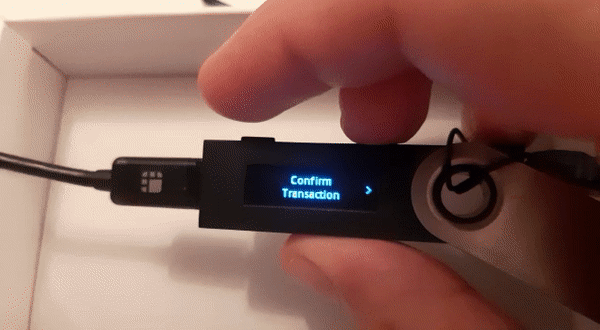
Press Send. You have to confirm this transaction on your ledger device by pressing both buttons at the same time on the ACCEPT option.
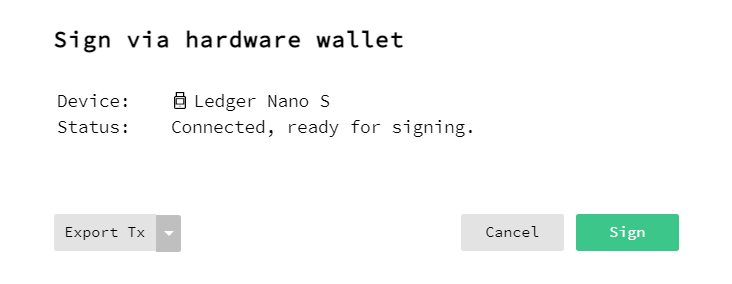
Press Sign, and sign the transaction on your Ledger device. It should look like this:
Remember that your hardware wallet is not storing your CKB, but it is storing the KEY to access your CKB on the blockchain. Always keep your seed phrase in MULTIPLE places and ALWAYS offline (no photos, video, cloud, notes, anything).