Adding cryptocurrencies to your Ledger Live wallet is a straightforward process, and the addition of Gigachad tokens is no exception. Follow these steps to integrate Gigachad into your Ledger Live setup efficiently.

In case you already have Gigachad (GIGA) crypto on a different wallet. Just follow Step 5 and send your Gigachad (GIGA) crypto from the wallet to that address.
Please download the last update of Ledger Live Application:
1. Ledger Live for Windows 10/11
2. Ledger Live for MAC
3. Ledger Live for Android
Before you start:
- A Ledger Nano X or S.
- Fully configured Ledger Live: Follow Ledger’s guide if you haven’t yet.
- Update your Ledger device firmware.
- Update your Ledger Live app.
- Ethereum App installed on your Ledger.
Step 1: Install Ledger Live
First, make sure you have Ledger Live installed on your computer or mobile device. You can download it from the official Ledger website. Follow the prompts to complete the installation.
Step 2: Connect Your Ledger Device
Once Ledger Live is installed, connect your Ledger hardware wallet to your device using the provided USB cable. Open the application, and you may need to enter your PIN to access your wallet.
Step 3: Update Firmware (If Necessary)
Before proceeding to add tokens, ensure your ledger firmware is up-to-date. This guarantees the best security and compatibility. To check for updates, navigate to “Settings” -> “Firmware” within Ledger Live.
Step 4: Enable Ethereum Manager
Gigachad (GIGA) tokens are based on the Ethereum blockchain, so you’ll need to enable Ethereum management. In Ledger Live, go to the “Manager” tab. If prompted, allow Ledger Live to access your Ledger device. Install the Ethereum app from this menu if you haven’t already.
Step 5: Add Gigachad (GIGA) Token
To add Gigachad (GIGA) tokens to your Ledger Live:
1. “Open the “Accounts” Tab: Navigate to the “Accounts” section.
2. “Add an Account: Click on “Add account.”
3. Select Ethereum Account: Choose your Ethereum account, where your Gigachad (GIGA) tokens are associated.

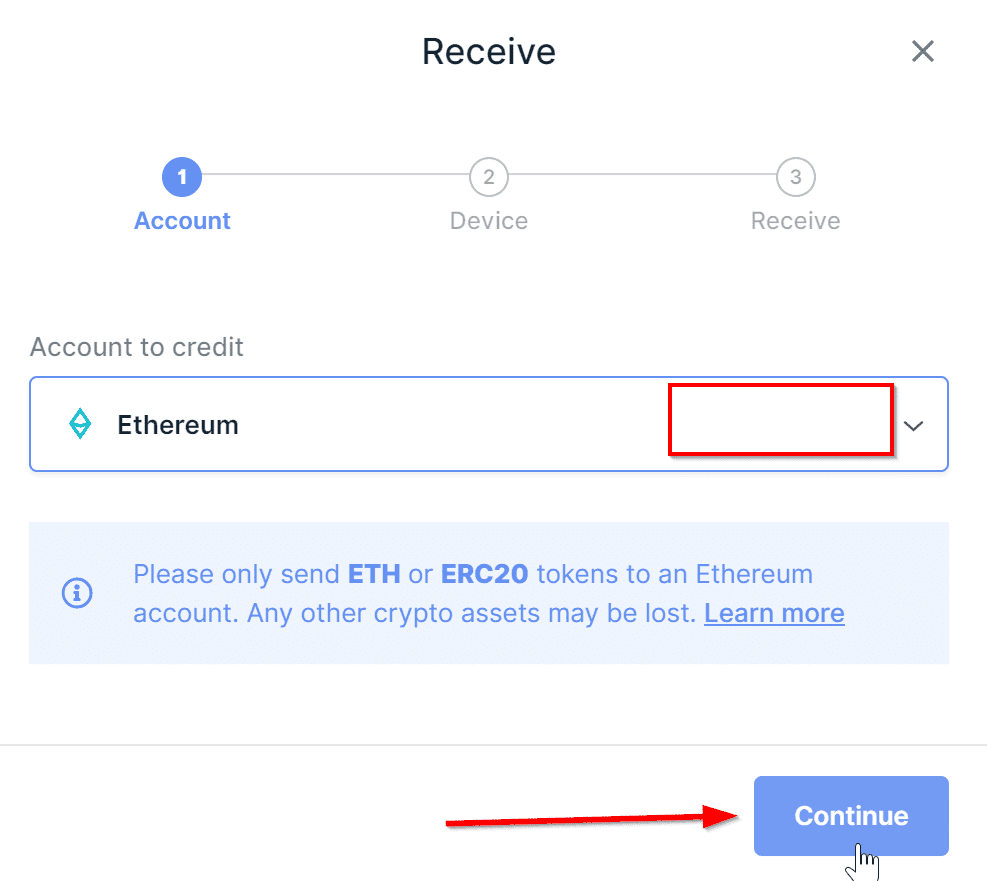
Step 6: Import Gigachad (GIGA) Tokens
After adding your Ethereum account, you can import your Gigachad (GIGA) Tokens:
1. Go to “Tokens” Within Your Account: Click on the Ethereum account you just added.
2. “Click on “Add Token”: Here, you can search for Gigachad (GIGA) tokens. If it’s not automatically listed, you can send Gigachad (GIGA) tokens directly to your Ethereum address.
Once the tokens are added, you should see the total balance reflected and the transactions associated with the Gigachad (GIGA) tokens on your Ledger Ethereum account.
Conclusion
Adding Gigachad (GIGA) tokens to Ledger Live is essential for ensuring you manage your digital assets securely and effectively. By following these steps, you can efficiently track and store your Gigachad (GIGA) tokens alongside your other cryptocurrencies. If you encounter any issues, consult the Ledger support page or engage with the community for further assistance.