If you want to manage your Chiliz (CHZ) cryptocurrency securely, adding it to your Ledger Live wallet is an excellent choice. This guide will walk you through the steps necessary to add CHZ to your Ledger Live application.
This article will help you create your first Chiliz (CHZ) with your Ledger wallet.
Please download the last update of Ledger Live Application:
1. Ledger Live for Windows 10/11
2. Ledger Live for MAC
3. Ledger Live for Android
Before you start
- Download and install the latest version of Ledger Live.
- Ensure your Ledger Nano S / Nano S Plus / Nano X runs the latest OS version.
Step 1: Install Ledger Live
1. “Download Ledger Live”: If you haven’t already, download the Ledger Live application from the official Ledger website to ensure you have the latest version.
2. “Install the Application”: Follow the installation instructions for your operating system (Windows, macOS, or Linux).
Step 2: Connect Your Ledger Device
1. “Connect Your Ledger”: Plug in your Ledger device using a USB cable.
2. “Enter Your PIN”: Unlock your device by entering your PIN code.
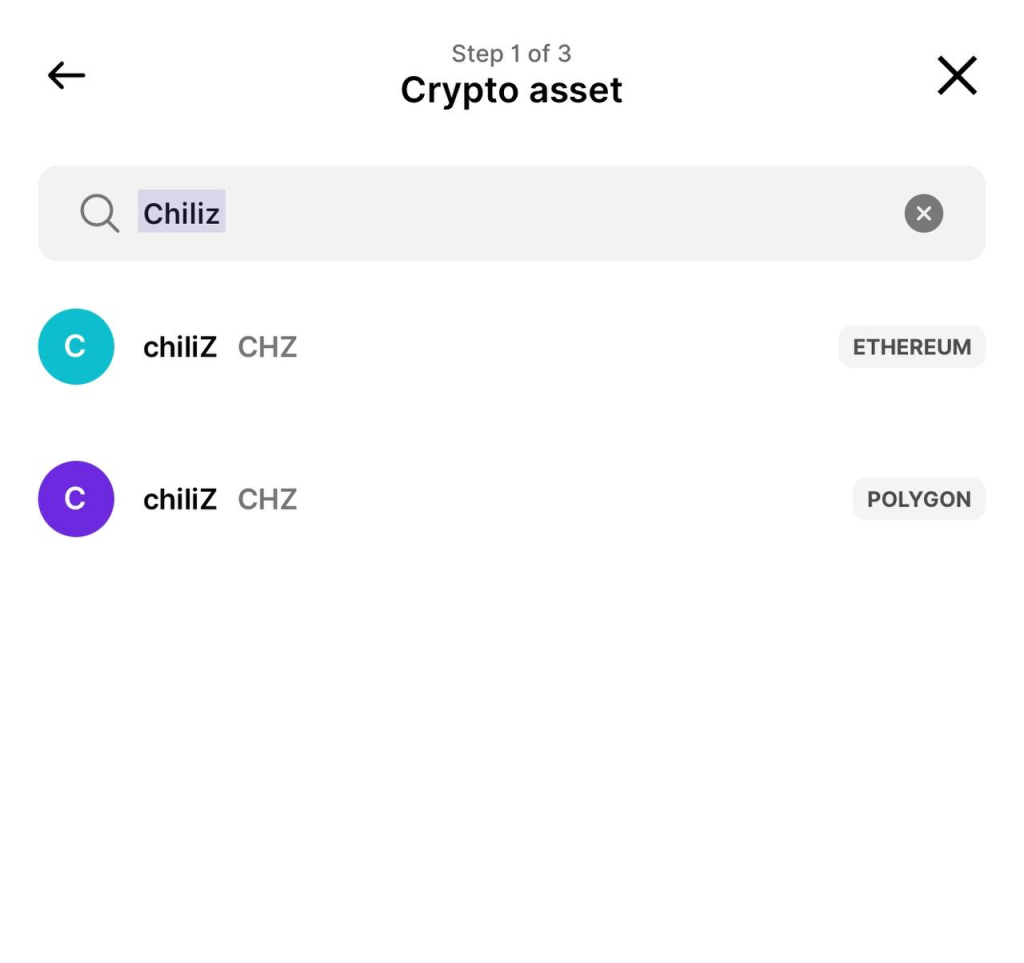
Step 3: Install the Chiliz (CHZ) App on Your Ledger Device
1. “Open Manager in Ledger Live”: Launch Ledger Live and click on the “Manager” tab on the left sidebar.
2. “Find the CHZ App”: In the Manager section, search for “Chiliz” or “CHZ” in the app catalog.
3. “Install the App”: Click on the “Install” button next to the Chiliz app to add it to your Ledger device.
Step 4: Add Chiliz (CHZ) Account in Ledger Live
1. “Navigate to Accounts”: Once the app is installed, go back to the Ledger Live main interface and click on the “Accounts” tab.
2. “Add Account”: Click on “Add Account” and select the newly installed Chiliz (CHZ) app.
3. “Synchronize”: Follow the prompts to sync your account, allowing Ledger Live to recognize your CHZ holdings.
Step 5: Receive Chiliz (CHZ)
1. “Get Your CHZ Address”: To receive Chiliz, click on your CHZ account and then click on “Receive”.
2. “Select Your Ledger Device”: Make sure your Ledger device is selected, then follow the instructions to generate a receiving address.
3. “Copy Address”: Copy the address and use it for transferring CHZ from other exchanges or wallets.
Conclusion
Adding Chiliz (CHZ) to your Ledger Live wallet is a straightforward process that ensures your cryptocurrency is securely managed. Always ensure you have the latest version of Ledger Live and the necessary apps installed to manage your assets effectively. If you have any questions or require assistance, check out Ledger’s official support resources or community forums.
By following these steps, you can efficiently manage your Chiliz (CHZ) and ensure its security with your Ledger device.