This article describes how to create a Celo (CELO) account with your Ledger device connected to Ledger Live.

Please download the last update of Ledger Live Application:
1. Ledger Live for Windows 10/11
2. Ledger Live for MAC
3. Ledger Live for Android
Before you start
- Make sure you have the latest version of Ledger Live installed on your phone or computer.
- Ensure that your Ledger Nano S / Nano S Plus / Nano X is running the latest OS version.
Install the Celo (CELO) app on your Ledger device
- Connect and unlock your Ledger device.
- Open Ledger Live and navigate to the ‘My Ledger’ section.
- If asked, allow Ledger Live to connect to your Ledger device.
- Find Celo (CELO) in the app catalog.
- Click the Install button of the app.
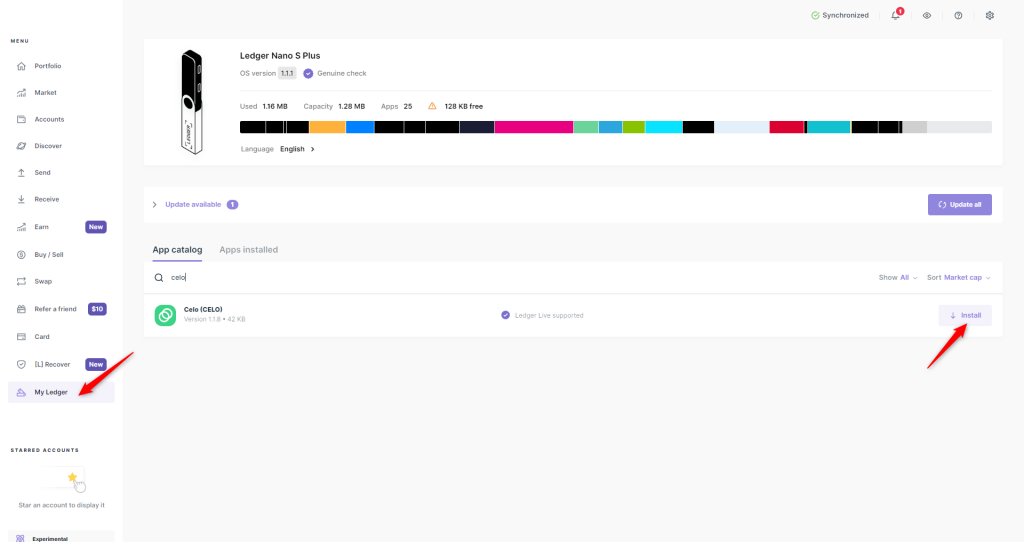
The Celo app is developed and supported by the Celo community.
Add a Celo (CELO) account to Ledger Live with your Ledger device
- In Ledger Live, navigate to the Accounts section.
- Click on +Add account, select Celo (CELO) from the drop-down menu, and then click on Continue.
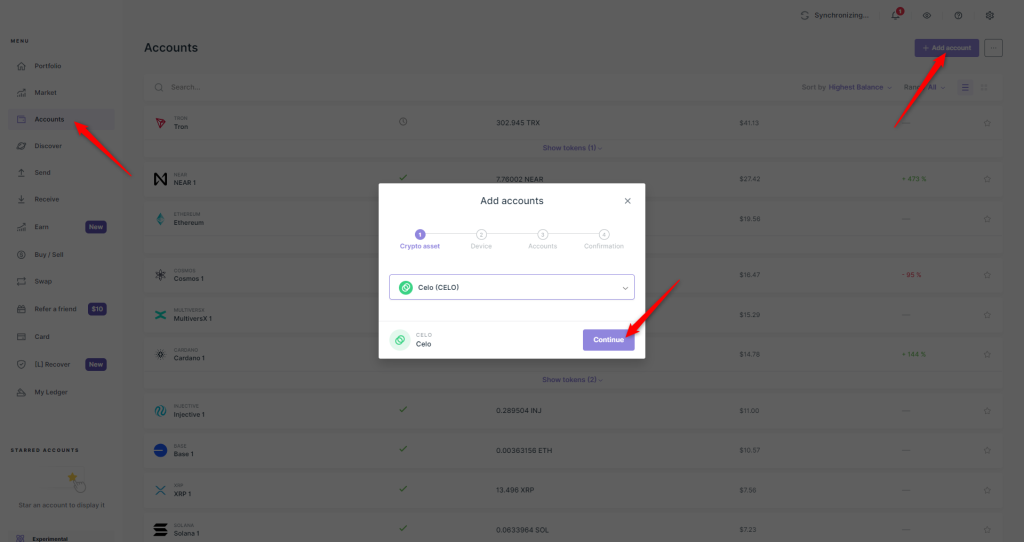
- When prompted, open the Celo app on your Ledger device using the buttons.
- You’ll be given the option to name your account or go with the default name. Once everything looks good, click on ‘Add account’ in Ledger Live.
- Click on ‘Done’ to finalize adding your account to Ledger Live.
You’re all set, you can now navigate to your Celo account and use the ‘Receive’ button to obtain and verify your Celo account address with your Ledger device and use it to receive Celo (CELO) coins in your Ledger account.